Setting Up Your Wakeboard Wake for Each Skill Level

How to make wakeboarding more fun for everyone by setting every rider up for success

This one is near and dear to our hearts. As you may have heard before, SouthTown started in the year 2000 as a wakeboard camp and ministry, and only more recently has evolved into boat dealerships and beyond. We’ve continued to offer wakeboard camps every summer since then, and over the years we’ve picked up on a trend that we feel needs to be addressed. Plainly, people associate wakeboarding with pain. We’re not here to tell you that you’re never going to get rocked when trying to progress on a wakeboard, but the purpose of this post is to teach you how minimize the hard hits by setting your boat and your expectations right. We’re going to break it down by skill level, so step one is being honest with yourself about which of these categories you fall into.
Make Wakeboarding More Fun For Everyone With The Proper Setup
Setting Up Your Beginner Wakeboard Wake

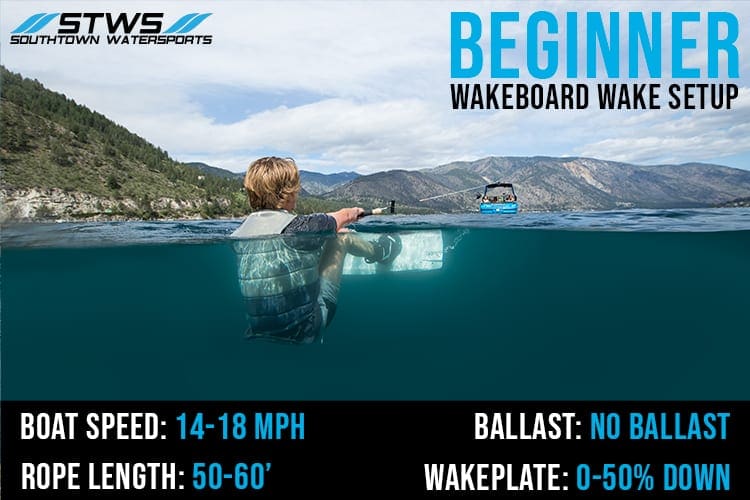
Beginner Wakeboard Wake Setup

First, let’s define a beginner. For us, a beginner wakeboarder is anywhere from a first timer to someone that is landing their first one-wake jumps or 180’s. Once you’re going wake-to-wake (jumping from one side of the wake to the other while clearing the middle), you’ve graduated to intermediate in our book. So with that, let’s talk about the most important thing first: expectations. Beginners range from small kids to adults that are being pressured to “do a flip!” their first time riding. In either case, it’s important to set your sights low, literally. Your first few times riding should be spent getting used to using your edges to steer, crossing in and out of the wakes, and maybe using the wake to get a few inches of air once you’re comfortable with your edges. Just like Michael Jordan had to learn to dribble a basketball before he learned to dunk one, you should be taking the time to understand the basics before taking your riding any further. Even if you could learn a flip your first time riding, not understanding the basics will ensure that you don’t progress much further from that point.

This brings us to another crucial part of setting a beginner rider up for success. We’re talking about how you set the boat up for them to ride. If you take one thing away from this whole post, let it be this: do not fill any amount of ballast for a beginner wakeboarder under any circumstance. Nearly all of today’s wake boats are capable of producing a pro-level wakeboard wake, which is a recipe for disaster when an inexperienced rider is behind the boat. Skateboarders don’t learn their first ollies on a mega ramp, and there’s no reason that you should learn to wakeboard on the biggest wake your boat is capable of making. The goal for a beginner should be to make a clean wake that’s easy and unintimidating to cross over. The other critical factor for a beginner having success on a wakeboard is the speed of the boat. Very small riders can learn to ride as slow 14mph, where riders learning to cross over the wake and attempt their first jumps may prefer the way the wake cleans up at 17-18mph. Either way, any speed in this range will create a learning environment where beginners can feel less intimidated and will be far less likely to get hurt when falling. After all, for a beginner and especially for kids, one unnecessarily hard fall can be the difference between a long wakeboarding career and never wanting to ride again.

Setting Up Your Intermediate Wakeboard Wake

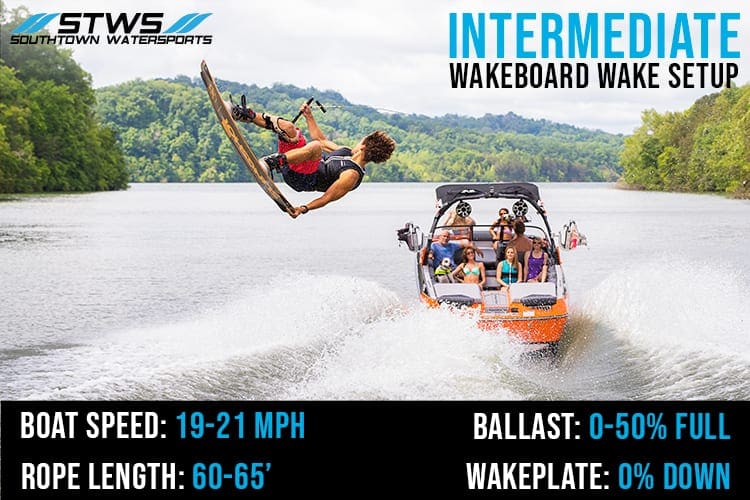
Intermediate Wakeboard Wake Setup

We would define an intermediate rider as someone that has mastered heelside and toeside one-wake 180’s and learned to jump wake-to-wake. Ideally, the intermediate rider is looking to learn how to jump wake-to-wake from both sides, take their 180’s wake-to-wake, and get comfortable riding and jumping switch (with their opposite foot forward). Just like for a beginner rider, to set up an intermediate rider for success you’ll want to start without any ballast in the boat. The reason for this is that while riding a bigger wake and getting more air may be more fun, it can also create some bad habits. Learning to create more pop using your legs and not a massive wake will help to ensure that early intermediate riders are able to maximize the heights they can achieve later in their progression. Once the rider has established good habits of maximizing their pop using technique, you may consider slowly adding ballast over time, up to about 50%.

Along with trick progression and higher ballast levels come higher speeds and longer rope lengths. Increasing speed will help to ensure the wake stays clean as more ballast is added, and letting the rope out longer will give the rider more time in the air. While the intermediate rider has gained significantly more control at this stage of their riding, it’s important to remember that mistakes will still be made, and there’s no reason to go faster than necessary. Every mile per hour makes the falls hurt that much more, which is why we recommend keeping it between 19-21mph and finding a rope length that makes clearing the wake easy while still giving the rider plenty of time in the air. It’s important to note that increasing your boat speed will make the distance between the two sides of the wake narrower, but letting your rope out will make it wider. Check out the specs we’ve listed in the image above to get an idea of where to start, then dial it in to your liking.

Setting Up Your Advanced Wakeboard Wake

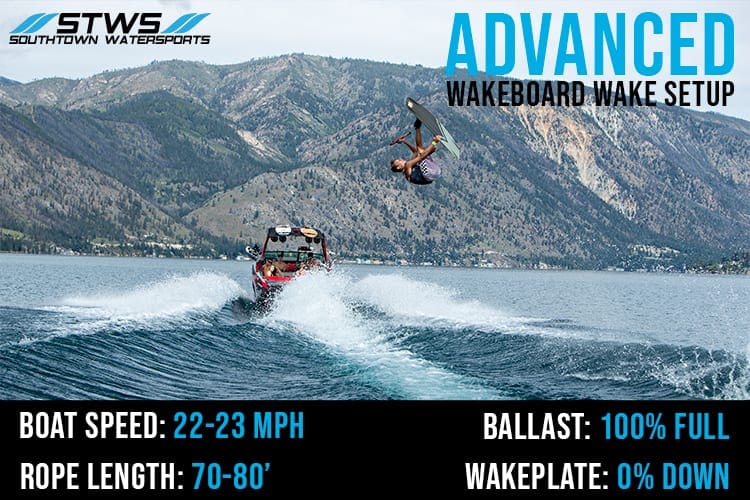
Advanced Wakeboard Wake Setup

For the purposes of this post, we’ll say that riders that can land wake-to-wake inverts and handle-pass spins consistently would fit into this category. Make no mistake, though. Just because you know how to do a tantrum does not mean you’re an advanced rider if you skipped basics like jumping wake-to-wake on your toeside or riding switch. With that, an advanced rider has completely different needs in their setup than any level that comes before, and while we can give you an idea of a setup one might prefer, a lot of it will come down to personal preference. At this stage of progression, a rider should have complete control of their board at all times, have fallen enough to understand how to fall more gracefully, and be looking for a setup that opens the door for the next level of tricks they’ll be trying. That is why an advanced rider should feel comfortable riding with full ballast at a higher speed with a longer line. The combination of these three factors ensures that the rider’s time in the air is maximized, allowing them the time to land mobes, higher level spins, and beyond. We’ve laid out some tried and true advanced settings for you modern Supra or Moomba in the image above, but at this stage of the game, you probably already have a setup that suits your riding style.